Thanks for upgrading! You're really going to enjoy the GPS tracking.
So let's get your data moved over from Lite so you're good to go. The short answer is that there's a tutorial inside MileBug on the Backup tab at the bottom. Just click "What is iTunes File Sharing?", and then click "How to use File Sharing with MileBug". (see screenshots to the right and below)
Here's some detailed steps to help you with this simple process:
FIRST: Backup MileBug Lite Data to Your Computer
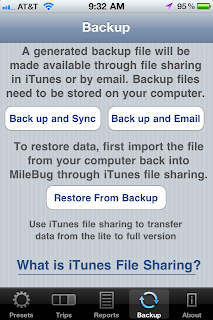
1) Open MileBug Lite and select the Backup tab at the bottom
2) Tap the "Back up and Sync" button
3) Connect your iPhone to your computer and move the backup data file to your computer using iTunes File Sharing (see the tutorial inside MileBug mentioned above - screenshot below)
THEN: Load Lite Data file into full version of MileBug
1) Use iTunes File Sharing to put your Lite data backup file into the full version of MileBug
2) Launch MileBug (full) on your iPhone.
3) Select "Restore From Backup"
4) Choose the backup file in the picker from step 1 (probably only one there)
5) Tap "Restore Data"
That's it! Remember, the iTunes File Sharing is how you can always make a backup of your MileBug data. We recommend doing this on a monthly basis, and always doing it before you upgrade either the iOS or MileBug.
^